 |
| THIS JACKET IS FINISHED |
|
|
|
I HAVE FINISHED MY JACKET, and I absolutely, one hundred percent LOVE it. I am so pleased with how it turned out that I can't even quite believe that I made it myself. :D
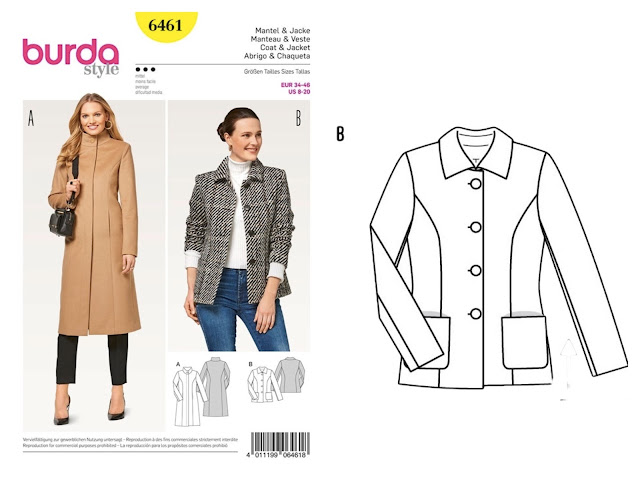 |
| The pattern I am using: Burda 6461, view B |
At the end of
my last post
on this subject, I was at the point where I had done a bunch of fitting
work with my not-very-interesting pattern (Burda 6461, view B) and was
ready to cut into my fabric.
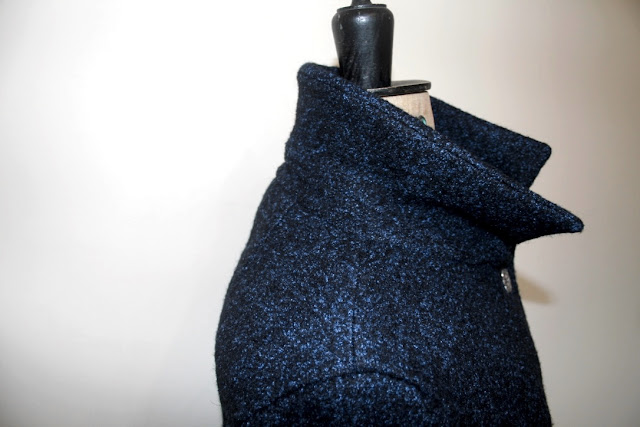
Between a lack of daylight at this time of year and really terrible, wet, and gloomy weather, I was forced to take all my photos indoors and without much natural light. I've had to
over-expose a lot of the photos that follow in order to actually show the fit etc, but I did manage to
get one this one that more or less accurately shows the colour of the fabric, which as you can see is navy with a lighter blue fleck:
 |
| This is the best shot I managed that shows the actual colour of the fabric |
I had concerns about fitting even this simple pattern onto my piece of fabric, but in the end I had
just enough,
though I had nothing but strips and bits left over. Luckily, it was a
fairly substantial boiled wool (a.k.a. loden), which meant no fraying
edges and therefore no extra seam allowance required. It was an absolute
dream to sew and it pressed beautifully as well. The only downside is
that I'm concerned that the fabric might pill or bobble in wear, but I
guess I'll just give it a periodic shave if it does. I'd definitely sew
with boiled wool again based on this experience.
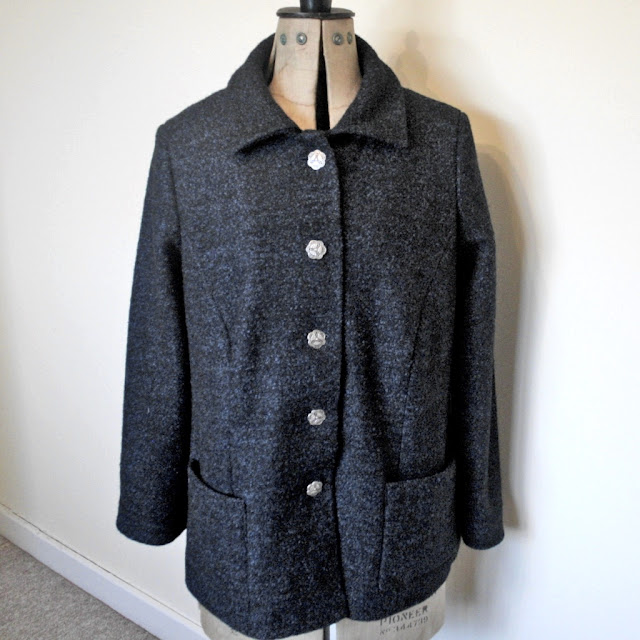 |
| Front view, buttoned up, on Flossie, over-exposed to show the details |
I interfaced the whole centre front piece, the hem and sleeve hem, armholes and back neck and the back facing using my new steam press. I used a lightweight tricot/knit fusible interfacing because the wool had so much give and movement, and this seemed to work OK although I don't think the glue adhered very well to the textured wool surface.
 |
| Rear view, also over-exposed. |
After all the prep work, the actual construction of this jacket was all really straightforward except for the collar. When I was making the muslins, I did at one point attach a mock up of the collar to one of them just to get an idea of what kind of size and shape it was. However, I didn't make the whole collar or even, to be honest, read the instructions for how to put it together and attach it. When I got to that point in constructing the actual jacket, I was all O.o at the instructions. It was seriously the ODDEST way to attach a collar I've ever seen. I have to admit that the description of what to do baffled me initially
to such an extent that I actually put it aside and spent some time
making my sleeves in order to mull over what it was that the
instructions wanted me to do.
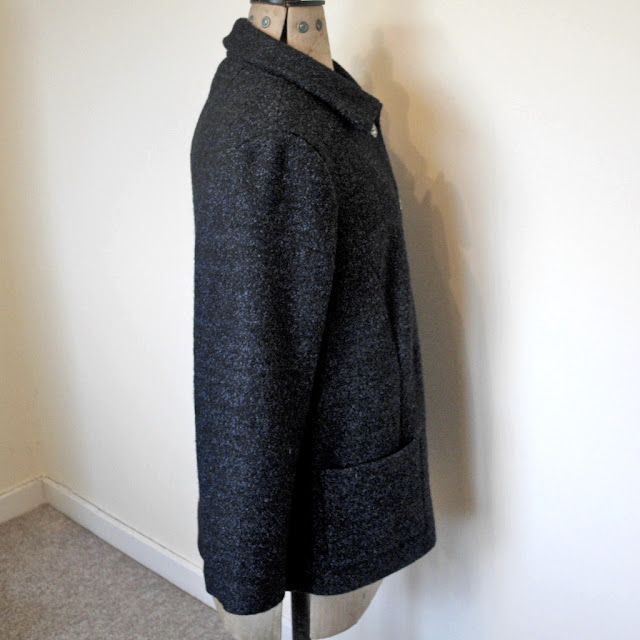 |
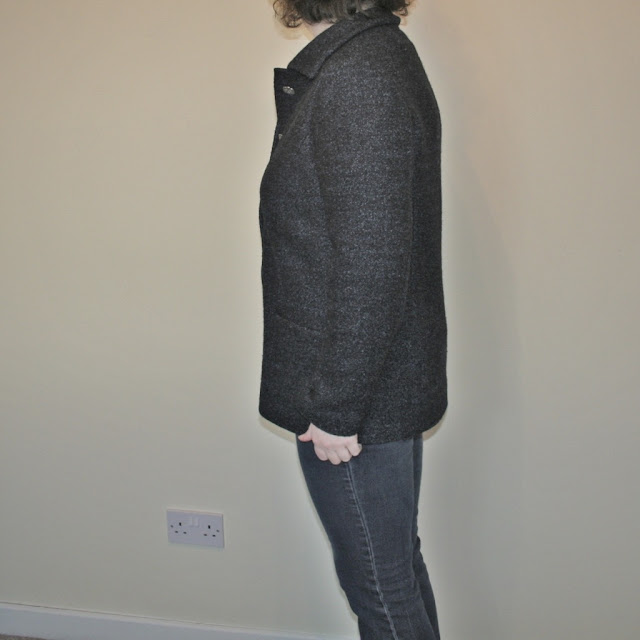
| Side view, over-exposed |
The front facings of this jacket are part of the center front pattern piece, and they extend back to the shoulder seam. Once you have your front and back bodice constructed, first you attach the back facing to the two front facing shoulder seams to make a big loop. Then you sew the under-collar to the back of the jacket, and the upper collar to the facings, then re-arrange the facings and collar so that you have right sides facing, and then you sew the collar construction seams together. When you turn the collar, you therefore flip the whole facing part of the jacket into position.
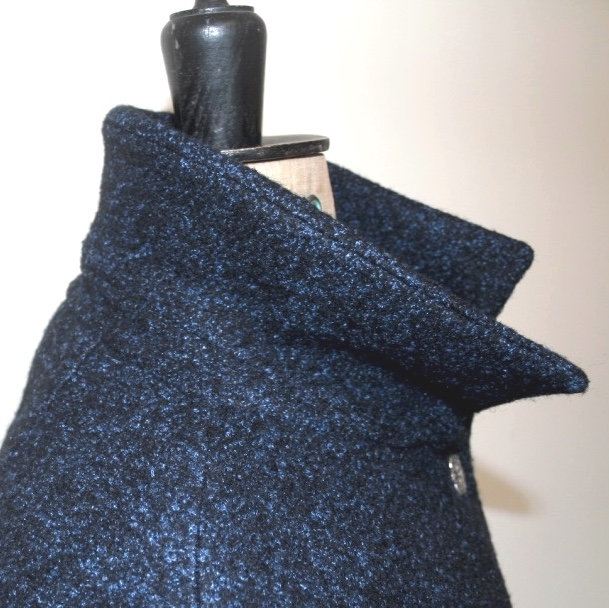 |
| Good things: collar seams rolled to the under-collar; Bad things: disappointingly non-pointy collar points. |
However weird the instructions were it did work out perfectly in the end! I was pleased that Burda supplied separate pattern pieces for the upper and under collar, which made rolling the seams under for a nice collar finish much easier. My only problem with the collar in the end was that I spent ages trying to get my collar and the neck edge nicely pointy, but though I trimmed and pressed and poked to the best of my ability, this fabric is just too bulky to form a perfect point. In the end I decided I had achieved "good enough" and moved on.
One thing new to me in this jacket is that I used a piece of pre-made sleeve head to add some definition to the upper curve of the sleeve attachment seam. I am definitely a convert to this for future jacket and coats, as it really improves the look and shape of the sleeve cap and it's (a) a very cheap product, and (b) a very quick and easy process (I used the instructions on how to attach it that I found in the Singer "Tailoring" book). You definitely get a good return for taking just a few minutes to do this extra step in the construction process.
 |
| Lining and front facings |
I lined this jacket in a blue and black polyester satin animal print-ish fabric, which I bought on Goldhawk Road in 2013. Burda's instructions for lining things always involve a metric tonne of hand-stitching, which I am basically never willing to do. Instead I bagged the lining using the instructions in a book called "Easy Guide to Sewing Linings" by Connie Long (which is an invaluable little guide to all things lining, I can't recommend it enough). That said, as usual I got to the point where I was trying to turn an entire bulky jacket through one sleeve and asked myself how I possibly thought
this was easier than a metric tonne of hand stitching. Overall the lining process was mostly straightforward, although for some reason I struggled again with the sleeve caps despite removing about a mile of ease.
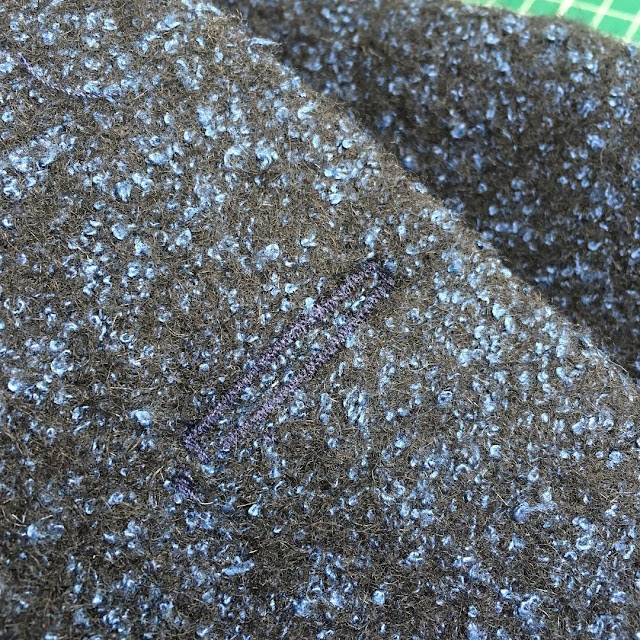 |
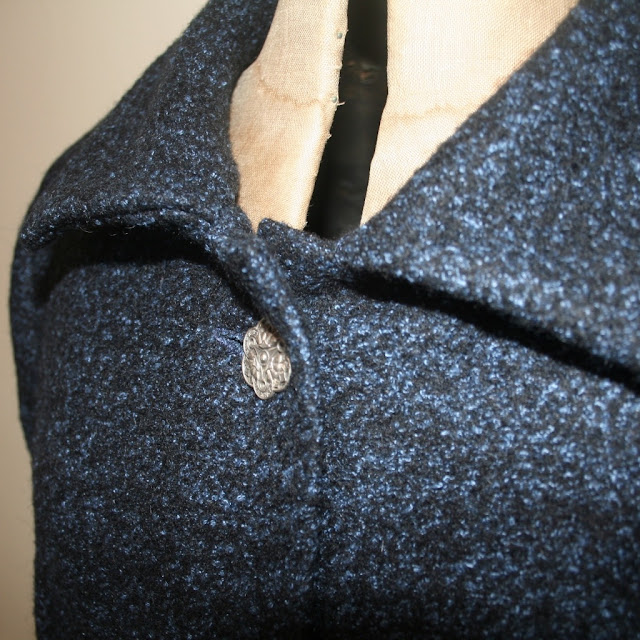
| Buttonhole |
My final job was the installing the buttonholes and buttons, or as I like to call it, How To Ruin Two Weeks Work In Under a Minute. The pattern calls for 4 buttons, but I decided on 5 for one good reason (it enabled me to put the buttons at well-spaced intervals round my bust point) and one bad reason (my buttons came in a pack of 5). As always, my machine was a total diva about the buttonhole process. Either everything is situated EXACTLY PERFECTLY and the buttonhole sensor works fine, or else it is a catastrophe. I put in 5 buttonholes and 4 came out perfectly and one was a catastrophe, which is about par for the course. Luckily, the problematic buttonhole isn't in the least bit obvious, to the point where I doubt anyone who isn't me will ever notice at all.
 |
| Wearing the jacket: open. |
I'm really pleased with the fit. To recap, I started with a size 44 and then made the
following fitting changes: lowered the bust point, narrowed the
shoulders, added length in the upper back with a high round back
adjustment, raised the armholes, and removed (a HUGE amount of) ease and
height from the sleeve cap. I make a square shoulder adjustment in most
patterns, but I achieved the same effect in this pattern by sewing it
as designed but omitting the shoulder pad.
So I should also have a photo of me wearing the jacket buttoned up to show the fit except, uh, this is what I took:
 |
| This is a very helpful photo. |
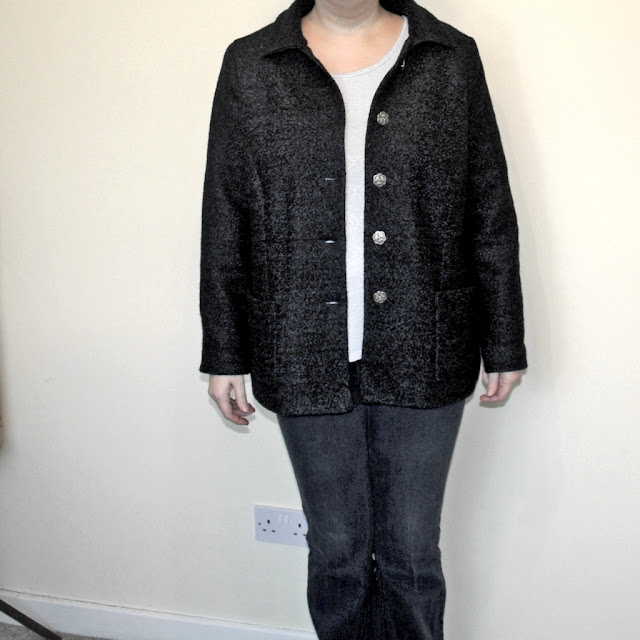
So you will have to make do with a naff Instagram mirror selfie for a buttoned-up view:
 |
| Instagram front view |
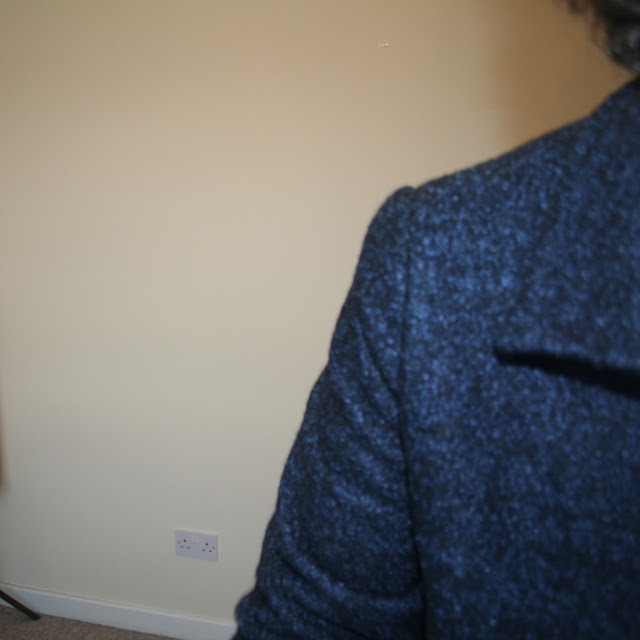
I think all my
fitting changes worked out well except I was maybe a little
over-enthusiastic with my high round back adjustment. There seems to be just a little excess fabric just below the collar when I'm wearing it. Next time I do this adjustment I'll scale back the size of my change a little.
The most important
thing for me however is that I feel like I can move around really well,
including the crucial "reach forward to hold the steering wheel" test. I
am going to start raising the armhole on e.v.e.r.y.t.h.i.n.g in the
light of discovering what a difference that adjustment makes to ease
of motion. I am also delighted by the fit at the bust and shoulder,
which is a significant improvement on, well, pretty much every coat I've
ever owned.
 |
| Side-view |
 |
| Rear view, hugely over-exposed to show the fit |
In conclusion: Quite a lot of the time I feel something of a failure on the sewing front. I make a lot of easy stuff and I am quite competent at doing so. However, when I try to make anything remotely more complex or try to get something to actually fit well I don't seem to do so well. Now, to be fair, this is not a particularly complicated pattern either BUT the end result fits really well and it is legitimately well-sewn, and that's an enormous confidence boost. I feel really encouraged about working some more on fitting, in particular, because I definitely see that I improved the fit quite significantly with the changes I made between Muslin #1 and the Finished Jacket.
Overall, I'm not sure I can actually express how thrilled I am with this
jacket! It's definitely going to be the best thing I've made this year; it's probably in the top three things I've EVER made! And I finished it
just in time to wear this weekend, when the UK is about to turn quite a
lot colder than usual! :D
Next up: after this more complicated project, I'm going to go with something fast and easy. I've prepped the pattern pieces for a McCall's 6844, a.k.a. That Cardigan Pattern That Everyone Else Has Made A Million Times Already, which should be a snap to cut and sew. This is a slight change to my plans -- originally I was going to sew an Ottobre cardigan in purple ponte, but I've gone for a McCall's pattern in blue and white scuba for ... reasons, I am sure. :D


you should be thrilled, great fit and it looks fantastic. Love the fabric and you will wear for years to come.
ReplyDeleteThank you! :D
DeleteYES!!! It turned out super fantastic!! Aren't you glad you just went for it!? The fabric is lovely, the fit is lovely, it's sewn so nicely...
ReplyDeleteI won't go on and on about Burda but even when their instructions make you throw up your hands in a fit at times, they generally just...work.
Can't wait to see the cardigan!
I AM SO GLAD. It was hard to get started but once I finally got going I definitely gathered a lot of momentum.
DeleteSometimes with Burda you just have to go with it, I agree. On this occasion I felt like the most useful thing was actually the numbered notches, because I was just like, OH! you mean THOSE two points go together! and I suddenly understood what I was doing. :D
I loved reading your journey with this jacket and so happy it turned out to be fabulous!
ReplyDeleteThank you! I really love it too! :D
Delete