Wednesday 28 February 2018

February wrap-up + March plans

We're in the grip of a particularly cold spell of weather here in the UK so obviously I finished up February by making a short-sleeved, light-weight top. Nothing like a bit of totally unseasonal sewing!

Ottobre 02-2018-01 "Valentine" blouse (Images from Ottobre magazine)

This is Ottobre 02-2018-01, from the Spring/Summer issue that dropped on my doorstep earlier this month. The issue has a bit of a vintage feel to it and I like it a lot. I definitely also want to make a couple of the knit dresses in this issue at some point and I plan to make one of the blouse patterns from this issue for my March magazine challenge. This top was just a bonus that I snuck in to my sewing queue for a couple of reasons: I wanted to make a simple pattern to see what I could transfer from what I've learned about fitting Burda patterns to Ottobre; and I was in desperate need of something quick and easy to make after sewing two more complicated items this month and having more of the same on the horizon in March.

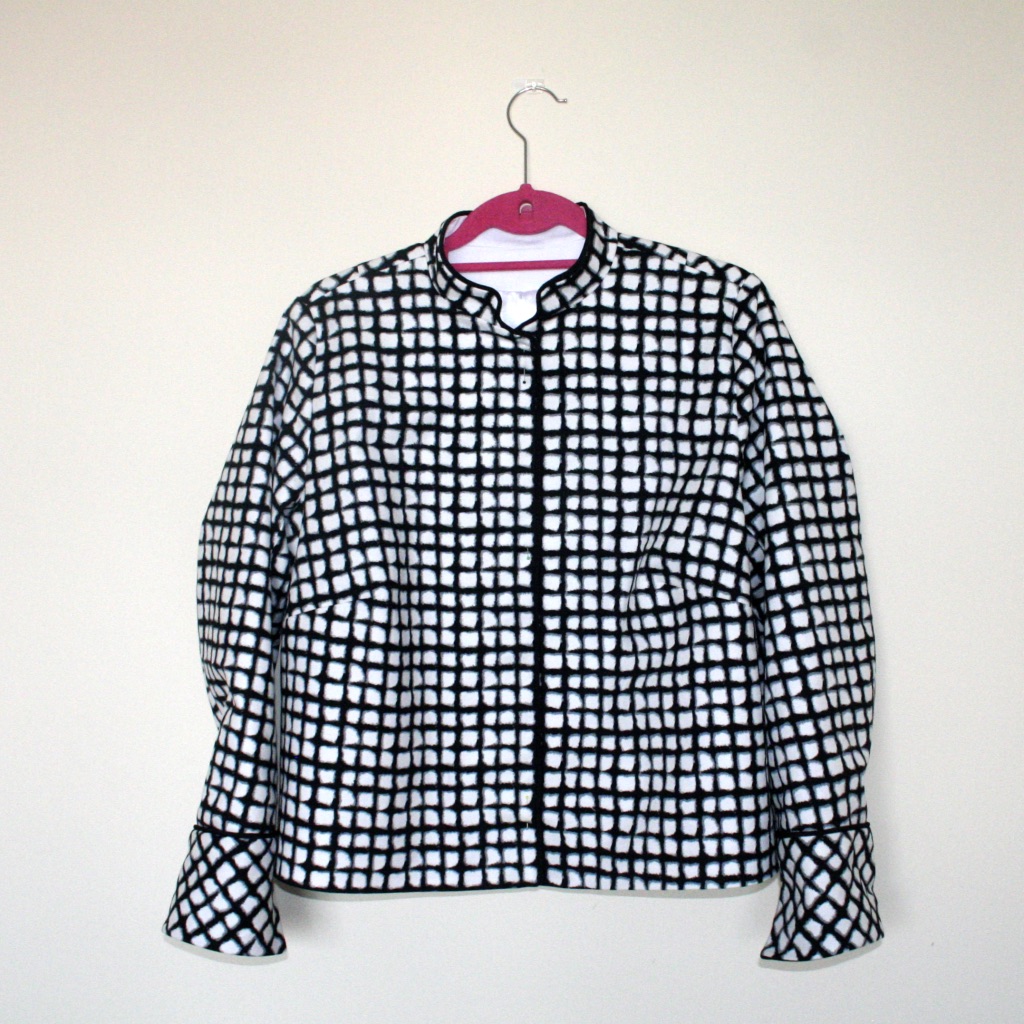
My version of Ottobre 02-2018-01 -- the shoulders do not look too poofy here but...

My top is made in one of the oldest garment fabrics I had in stash -- in fact, I used the other half of the piece I bought back in 2012 for the first top I ever made (which was a disaster that I was insanely proud of at the time but never actually wore). I showed the photo of this new finished garment to a friend of mine and she was like "Your fabric has the screaming faces of the damned on it!" which I can't decide how to take, really. Maybe I should have turned the fabric the other way up.


This is my first Ottobre pattern since I've embarked on my recent "make my tops fit better!" campaign, so there was some trial (and error) involved in choosing the size. I went with a size 40 neck and shoulder, and size 44 through the body. I think I might have been better off with a size 42 through the neck and shoulder, and that is what I will try with my next Ottobre top pattern in March. Other than that, I adjusted for square shoulders (about 0.8cm), high round back (with shoulder darts) and lowered the bust point. I lowered the bust point a LOT, actually, Ottobre seem to draft for a woman whose bust is right up around her armpit.

On me, with visible shoulder poofiness

I made one change to the design of the pattern, which is that having eyeballed the neckline I decided I didn't need to cut the back in two pieces and have the button closure -- I just cut it on the fold so I could pull it over my head. This works fine, although I wish I had cut the neckline in a slightly lower scoop because I find that more flattering to my body shape. However, the biggest problem is that I just don't like gathered shoulders. I knew that going in, of course, but the modelled garment didn't seem to have the poofy shoulders that gathered shoulder garments often have and so I decided to risk it. Alas, my version does have poofy shoulders, and I am not a huge fan. I do like the full, floaty short-sleeve that you get as a result of the wide sleeve, but I probably won't make this pattern -- or anything else with a gathered sleeve head -- again.

And that's it for me for February. I am very pleased with my sewing output this month, even if some of it felt like very hard work at the time. :D

I am also calling an end to my winter sewing. It's actually still very cold right now and spring therefore seems very far off, but I like to have my wardrobe mostly waiting for me to start wearing when the change in season rolls around. For that to happen, I have to start sewing a few weeks ahead. That said, I don't actually have a spring specific wardrobe. In spring and autumn I typically just take out the heaviest clothes from my winter wardrobe, and substitute in a few transitional, mid-weight pieces and layering items. I usually add in a couple of warmer weather garments just in case we have a couple of days of more warmer, sunnier weather.

Here are my plans for March:

Planned raincoat pattern: Burda 08-2004-109 (images from Burda.ru)

- My most urgent spring/autumn/transition wardrobe gap is another raincoat. I did make a red raincoat in 2016 that I like a lot. It is still in my wardrobe and I've worn it quite often, but to be honest it's not the most useful colour coat when the rest of my wardrobe is so very heavy on blue, green and turquoise. I'm planning to make one in navy this month. I did consider making a classic trenchcoat, until I tried one on in a shop and remembered that actually, double-breasted, boxy cut, raglan sleeved coats are not my favourite look on me AT ALL, and I would be much better off with a different sort of pattern. The front-runner at the moment is Burda 08-2004-109. Is it weird to make such an old pattern? I feel like it's a pretty classic style but there's a part of me wonders whether it wouldn't be better to find something more recent.

- Long-sleeved cotton button-front shirts are a favourite layering item that I wear year round, so the "Make All The Shirts" plan continues (hopefully less painfully this month). I'd like to get at least one more finished before the end of the month, two if possible.

- My Magazine Challenge for the month is also a collared shirt -- Ottobre 02-2018-10. I don't dislike the March issue of Burda at all, but nothing really jumped out at me that I instantly wanted to make, nor from Knipmode March, whereas I am very taken with the slightly vintage-y look of this blouse. The personal/skill challenge for this one is that I have some doubts about the fisheye darts at the front, as that's a bust fitting method I've never quite managed to sew successfully.

Saturday 24 February 2018

Slow (but somewhat successful!) shirt sewing + a stress-relieving bag

After I finished my black and white jacket earlier this month, I intended to plough on, full steam ahead, into Making All The Shirts. Well, I did move on to making shirts, but the last ten days or so have been less a full-steam-ahead-shirt-apalooza, and more a lengthy and rather trying experience making a single shirt.

I've made several previous attempts to make a classic, button-fronted shirt, with mixed success. The best outcome I had was a chambray shirt I made using an Ottobre pattern in 2014, which is still going strong in my wardrobe. Since then, though, most of my shirt-making attempts have been unsatisfactory to some degree, mainly because of the fit. Most have ended up going into the recycling/donation box after very few wears because they were just uncomfortable to wear.

My big focus for shirt-making this year therefore is achieving better fit. I decided to start with something relatively simple with a solid coloured fabric (no pattern matching!) and a straightforward pattern. I was specifically looking for: a normal (not dropped) set-in shoulder/sleeve; a cut-on/folded button band; a back yoke; a bust dart; and a traditional collar + collar stand. My final choice was Burda 04-2010-114, which is, I have to admit, fairly uninteresting as shirts go, but has all the features I was looking for. I made this first version in an inexpensive navy cotton with a touch of lycra that I bought in 2016.
Burda 04-2010-114: Shirt pattern (images from Burda.ru)
I must tell you immediately, before I start complaining, that I think this is a really nice pattern and I will definitely make it again. All the problems I had with this particular shirt were of my own making! Overall, there are a LOT of sewing flaws in my completed shirt and as far as the finish of it is concerned, it's definitely not my best work. This was kind of depressing because I was really trying SO HARD to make The Perfect Shirt and that is really not what I ended up with. At all. In any way. Instead, I just had sewing session after sewing session where I just. kept. screwing. up.

My very imperfect navy shirt using Burda 04-2010-114

Everything I could have done incorrectly, I did incorrectly. I caught random folds of fabric in seams by mistake. The whole collar/collar stand sewing experience took forever, was utterly miserable and frankly the outcome doesn't bear up to any kind of close scrutiny. I also put the wrong interfacing on the collar and collar stand and made them much too stiff, but only realized how bad it was once I had already trimmed the seam allowances so drastically that unpicking/resewing with a new version would have been a nightmare. I set in a sleeve inside out. Two of my ten buttonholes were a complete and utter disaster. And so on. I don't think I've ever unpicked so much in my entire life.

Collar details. Not my best collar attempt and it took forever.
By the time I was 80% of the way through this shirt I was SO DONE with it. In fact, I was so done I very seriously considered binning it and moving on. At the very moment when I was contemplating shoving it in my fabric recycling bag, however, the post arrived and included a set of tools to install metal grommets that I ordered in order to finish off a tote bag. I took a time out and hit things with a hammer for a while (the results of which are below) and felt much better as a result! My screw-ups didn't end with the hammering, but I had worked off enough aggression to decide I should at least try to finish it.

Eventually, I got to the point where I needed to try on my shirt in order to position the buttons for my bust point. I was totally ready to hate it and declare it a wadder. I put it on and it was like: Oh! OH! This is actually really nice! And it is! There is one small fit problem I want to fix before I make a second version (the bust darts are just a little bit too long) but other than that, this shirt probably fits better than any woven top I have made to date, and it's certainly the best fitting button-front shirt I have made so far.


This is a terrible photo, but I took the other one standing in such a stupid pose that it was pointless.

In order to achieve this improved fit, I did a bunch of things that I have more or less established as my necessary adjustments to Burda patterns: lowered the bust point, did a rounded back adjustment and a large bicep adjustment, and raised the armhole). However, I also refined the fit in a couple of areas compared to previous sewing efforts.
Back view, more sensibly taken on a timer and not in a stupid pose.

- Dealing with the narrow shoulder thing.

I'm really taken with how much better tops and outerwear looks with the shoulder in the right place, which is sadly kind of a novelty for me. It was not something I could ever achieve in RTW clothes because I always had to buy to fit my bust, which reliably meant buying tops that were significantly too large for me through the shoulder. Until recently I've been making exactly the same mistake with my sewing -- sewing a straight 44 to fit my bust -- with exactly the same result. I've been working on this for the last few garments and I think I may now have cracked what my "usual" Burda adjustment needs to be for this problem.

With this pattern, I went back to the Burda size chart and spent some quality time attempting to measure my own shoulders as a starting point. According to the size charts, I'm a size 38 in shoulder width. I have taken this measurement before, but if I am honest, I've always kind of dismissed the outcome as an error on my part. It's very hard to measure your own shoulders, after all, and also honestly, I look at photos and in the mirror and nothing about my body shape says "narrow shoulders" to me. For this shirt, however, I took the radical step of believing the measurement and the Burda size chart. When I traced the pattern, I drew in the shoulder and armhole for both the size 38 and 44. Then I did a pivot and slide adjustment to blend them together, which ultimately meant hacking off just over 1.5cm from the shoulder seam. And it WORKED. This is the best shoulder width fit on a woven top I've achieved so far.

On the other side of the neck/shoulder issue, however, I'm still fine tuning my approach to the neckline. For this shirt I used the neck opening/collar/collar stand in size 44. Looking at it critically, if I pin the centre front of the collar stand together as if it were buttoned, it is clearly too big. It's not going to bother me with this shirt at all, which I will never wear buttoned up. However, I guess I know why so many previous Burda tops I've made have been too wide at the neck and prone to showing off my bra straps. I'm thinking for my next pattern attempt I might try believing the size chart again and make the actual size Burda's chart indicates for my neck measurement (which is size 40). You know, just in case that should happen to work. /o\

- Square shoulder. I have been doing a square shoulder adjustment for years now. With this pattern, the shoulder line is within the yoke piece, and I had to look up how to adjust that properly. Then I was sort of dithering over how much to adjust it by, and decided to try to be a bit more scientific than usual. It just so happened that I had just recently seen on someone's Instagram that they used a little clinometer app on their iPhone to get a better idea of *exactly* how their shoulder slope compared to a pattern. I decided to give this a go for this shirt pattern.

Nothing shocking came of this -- I looked at the slope for the shoulder in three separate Burda patterns I had out, and discovered they sloped fairly consistently at about 15-16 degrees. My shoulder slope is squarer at around 12 degrees. After drawing a bunch of lines, I concluded that I needed to raise the shoulder point of this pattern by 2cm, or, if I were using a pattern with a more standard shoulder seam, by 1cm on both the back and front. This is, in fact, pretty much exactly how much I usually adjust Burda patterns for my shoulders so there was nothing much gained immediately from this work. However, it should help me figure out my adjustment for patterns for other companies.

In conclusion: This is a lot of blather for a very simple shirt, but the upshot of it is that despite my miserable sewing experience and the poor finish I got, I really love this shirt because of the fit. I will definitely be back with another of these and hopefully will transfer a lot of what I learned making this to the rest of my Make All The Shirts plan.


Meanwhile, I also have a bag to show off! This has a rather long history, insofar as I cut it out back in August 2017, then realized I didn't have the right tools to finish it, got fed up, and stuffed it into a bag in pieces. I fully intended to get back to it, but you might recall I then keeled over and ended up in hospital in September last year. As a result, the whole thing went out of my mind until I was rounding up WIPs at the end of 2017 and realized that not only was the bag in pieces but I still hadn't bought a tool to insert the grommets. I finally put the bag together and ordered a grommet tool earlier this month. Hammering the grommets in place proved to be an extremely therapeutic interlude this week, and I am generally very pleased with how this bag turned out! The pattern, by the way, is the free Rope Handle Tote, from Sew4Home.

Monday 12 February 2018

February Magazine Challenge: Black and white jacket (Burda 02-2018-112)

Originally, when all I had seen were the previews, I had more than half decided to make the latest Burda variation on a theme of wacky top (Burda 02-2018-107) for the February edition of my personal magazine challenge. However, when my copy of the magazine arrived, what actually leapt out of the pages at me was Burda 02-2018-112, a short boxy jacket with piping details:

Burda 02-2018-112 Jacket and technical drawing (images from Burda.ru)

Although I hadn't thought to make it until later in the year, I already had a piece of fabric earmarked for a short jacket. I had no particular pattern in mind, so I was quite happy to shuffle my plans around and use this pattern.

My version of Burda 02-2018-112 in black and white cotton sateen

I bought this piece of black and white stretch cotton sateen as a remnant and it was (a) very cheap, and (b) not very big -- only just about 1.5m and fairly narrow (about 130cm wide). I just BARELY had enough fabric for this pattern. Actually, let me amend that: I didn't have enough fabric for this jacket. I had enough for the main pieces but not the front and back facings or even the collar facing. Luckily, I had a similar weight fabric in plain white in stash that I could easily substitute in. Since those parts of the jacket aren't really visible, I didn't feel like this was a problem at all.


Side view on Flossie -- as you can see, I did make some attempt to match across the sleeve/body

I had just about enough fabric to pattern match to some extent, and some parts of my pattern matching are good: the center front, the side seams below the dart, and the side-to-side view across the upper sleeve, front and back bodice. However, the under sleeve pattern piece was very problematic. I probably needed another 0.5m of fabric, maybe even more, to get any kind of match. With the fabric I had I really couldn't do any better so, eh, whatever, I'll take the ostrich approach: I can't see the rear view of the sleeves, so it's not really a problem. :D

The other fabric/print problem is the hem. So, you might have noticed that the hem doesn't follow the lines on the fabric. I could find literally no way to do that with this fabric/pattern combination. Something was going to be screwy no matter how I cut it out, so I decided to focus on the things that were most important to me, as far as matching the print and pattern were concerned. Of course, I'd LIKE a hem that looked like it finished evenly on a black line all the way round the jacket, but I couldn't have it AND have the centre front/side-to-side match.

Rear view, with extremely dodgy under sleeve pattern matching
Design-wise, I made a two tiny changes from the pattern as written. I left off the welt pockets -- my reasons were 5% aesthetics, 10% fabric limitations and 85% not wanting to sew welt pockets. My second change was that I put the fold-back cuff pieces on the bias, partly to avoid having to pattern match and partly because I thought it would look more interesting. Everything else I did exactly as the instructions suggested except that, as usual, I bagged the (plain white satin) lining.

Piping detail at the collar/centre front
My favourite part of this jacket is how the piping turned out and the fact that I got that collar to look really neat and symmetrical. As you can see in the technical drawing, the pattern uses piping at the point where the cuff meets the sleeve, and there is also a long continuous piece of piping that runs along centre front on both sides and up and around the standing collar.

The piping is 3mm piping cord covered in a plain black polyester crepe de chine. This is the first time I've made my own piping. I've put pre-made piping in several bags and on one pair of PJs, with varying degrees of success. For this project I decided to buy myself an inexpensive piping presser foot to see if that made it any easier. I'm definitely glad I bought it -- the piping went in so smoothly with it. The presser foot I bought was only £3 off eBay including p&p, so not exactly a major purchase, and worth it just for this jacket even if I were somehow to never use it again.

The only place the piping foot didn't help was in the twisty bit at the centre front. I ended up sewing that whole section of the seam by hand because even with my machine set to sew as slow as possible, I couldn't get the control I needed to sew it together correctly. I don't do a lot of hand-sewing and I'm not the best at it, but I figured that part of the garment isn't going to come under massive strain at any point, so even my less-than-perfect hand sewing should hold together.

I probably least like the turn back cuffs. I used a heavier weight fabric for the contrast inner because it's what I had in stash that was suitable, and eh, it's OK, but they didn't turn out brilliantly and I couldn't get good points on the cuff edges worth a damn. I also don't love how the jacket looks on me when the cuffs are turned back, in part just because I have a horror of 7/8 or cropped sleeves on jackets, and in part because the length is the same as the jacket hem, and it makes me look like a plaid box.

Naff selfie front view, because my regular front views didn't come out. Please excuse the plant that appears to be growing out of my elbow

Fit-wise, I am moderately pleased. I started with a size 44 and made what I currently consider to be my "usual" fitting changes (square shoulder, narrow shoulder, raise the armhole, lower the bust dart, make a rounded back adjustment with shoulder darts). I feel like I am still figuring out the right amount of rounded back adjustment. I think this jacket would have benefited from just a little bit more upper back room.

Side and rear view on me (the rear view with the cuffs turned up)
I am not 100% happy with the fit of the sleeves at the back, but I had MAJOR problems getting them into the armscye anyway so I am not surprised. I took some height out of the sleeve head before I cut out the fabric, but then when I was actually sewing it I had to take even more out on the fly, and I always think that is a problematic way to fix a sleeve head problem. However, again, ostrich approach: the main problem in on my back underarm. I can't see it, so it's not really there.

Overall, honestly, despite all the flaws in this jacket, I am kind of amazed at how well it turned out. I won't say this was a throwaway project, but I really wasn't prepared for how much I'd like it or how pleased I'd be with some aspects of the sewing. Another win for the magazine challenge approach, since I am pretty sure I'd never have made this without that impetus. :D

Next up: Many shirts. So many shirts.