Thursday 23 October 2014

Yet More Knits

I am still on a knit sewing rampage! Here are the first two of this week's garments.

First up, a cardigan in the lushest (and also most expensive) knit I have ever owned, which I bought half price (but still £7.50/m!) from Fabrix in Lancaster last year. I have been trying on and off to find a cardigan pattern that worked with it, to no avail. Then recently I saw the free Swoon Scarf Neck Cardigan pattern made up on... someone's, idk whose, blog and immediately thought it was a great match for this drapey, soft fabric. I particularly loved that rather than the usual boxy shape, this particular cardigan pattern uses princess seams to shape the bodice, and at the same time it's a very simple pattern with few pattern pieces, as you would expect from a free pattern.


By the time I tried this on I was already in love with the outcome because the fabric was so beautiful to handle. However, I actually also LOVE how this pattern turned out. I have a somewhat similar drapey RTW cardigan that I love from LTS that I have been looking to replicate forever. The only thing I've seen that comes close to my original is a StyleArc pattern, and I kind of hesitate at paying the indie price premium PLUS shipping from Australia AND only getting a single size for a cardigan pattern.

I used the sizing on the pattern to pick my size (in my case, a Large) and found it fit very well. (As always though, I am PROFOUNDLY irritated by pattern writers who don't provide metric. AARGH.) The sleeves were quite long on me, but that is much more easily fixed than if the sleeves are too short. I love the irregular hem.

Swoon cardigan in purple. I know the hem looks crooked at the back, but I swear it isn't.
So, the outcome of this pattern is really great, in my opinion, but it's not a perfect pattern. Don't get me wrong, it's a GREAT free pattern, but I would have been disappointed in it if I'd paid actual money for it. The problems really are the pattern-as-PDF-document and some minor technical pattern details. For one, the PDF layout is wasteful of paper. For another, OK, this sounds really nitpicky, but putting together PDFs is my LEAST favourite part of sewing from e-patterns, and this is probably the worst from a putting-together standpoint that I've ever used among garment pattern creators. Mainly the problem is that rather than labelling each PAGE and how it fits together, the pattern creator labelled the join of each PATTERN PIECE, which is just needlessly confusing, and I think more time consuming to fit together.

On the pattern itself, the pattern creator bizarrely chose to provide only a cross-grainline which is totally unhelpful for the purposes of laying out on your fabric. Since the front "scarf" piece is cut at an angle (and not quite on the bias, it's weird) it's actually quite important to have a proper grainline. I mean, it's 5 seconds work to add a proper grainline to work from but this is a basic part of a pattern that I don't feel I should have to do myself. Also, the sleeve head is symmetrical, which I don't love anyway as a sleeve design, but I dislike even more that the pattern piece for the sleeve is provided as if you're going to cut it on the fold, which would be such a weird and inefficient way to lay this out on fabric. In fact, from the way the pattern instructions are worded, it seems like the pattern author thinks you are going to cut out each piece individually from a single layer rather than laying it all and then cutting, and to of course therefore there's no such thing as a layout diagram provided. I noticed that this is the pattern creator's only adult pattern, so I'm wondering if she's just not used to the conventions. At any rate, the sleeve issue too was an easy fix, insofar as I just traced a whole sleeve using the half piece that the pattern provided, but again: fine with a free pattern, would not have been excited if I'd paid for it.

Swoon cardi as modelled by me, pls excuse my totally inappropriate turquoise top.
On the plus side, once I got past the mild problems with getting the pattern ready, everything went together absolutely beautifully. I especially love the way the scarf neck is constructed.

One thing I will say is that all the volume at the hip makes me look quite pear-shaped, which is quite amusing for me as I am actually the TOTAL opposite in shape. I guess if you're already a very pronounced pear you might not find that particularly desirable.

Overall, I think I have to say that I would recommend this pattern as a free pattern, but be prepared to have to grit your teeth through some of the initial stages of using it.

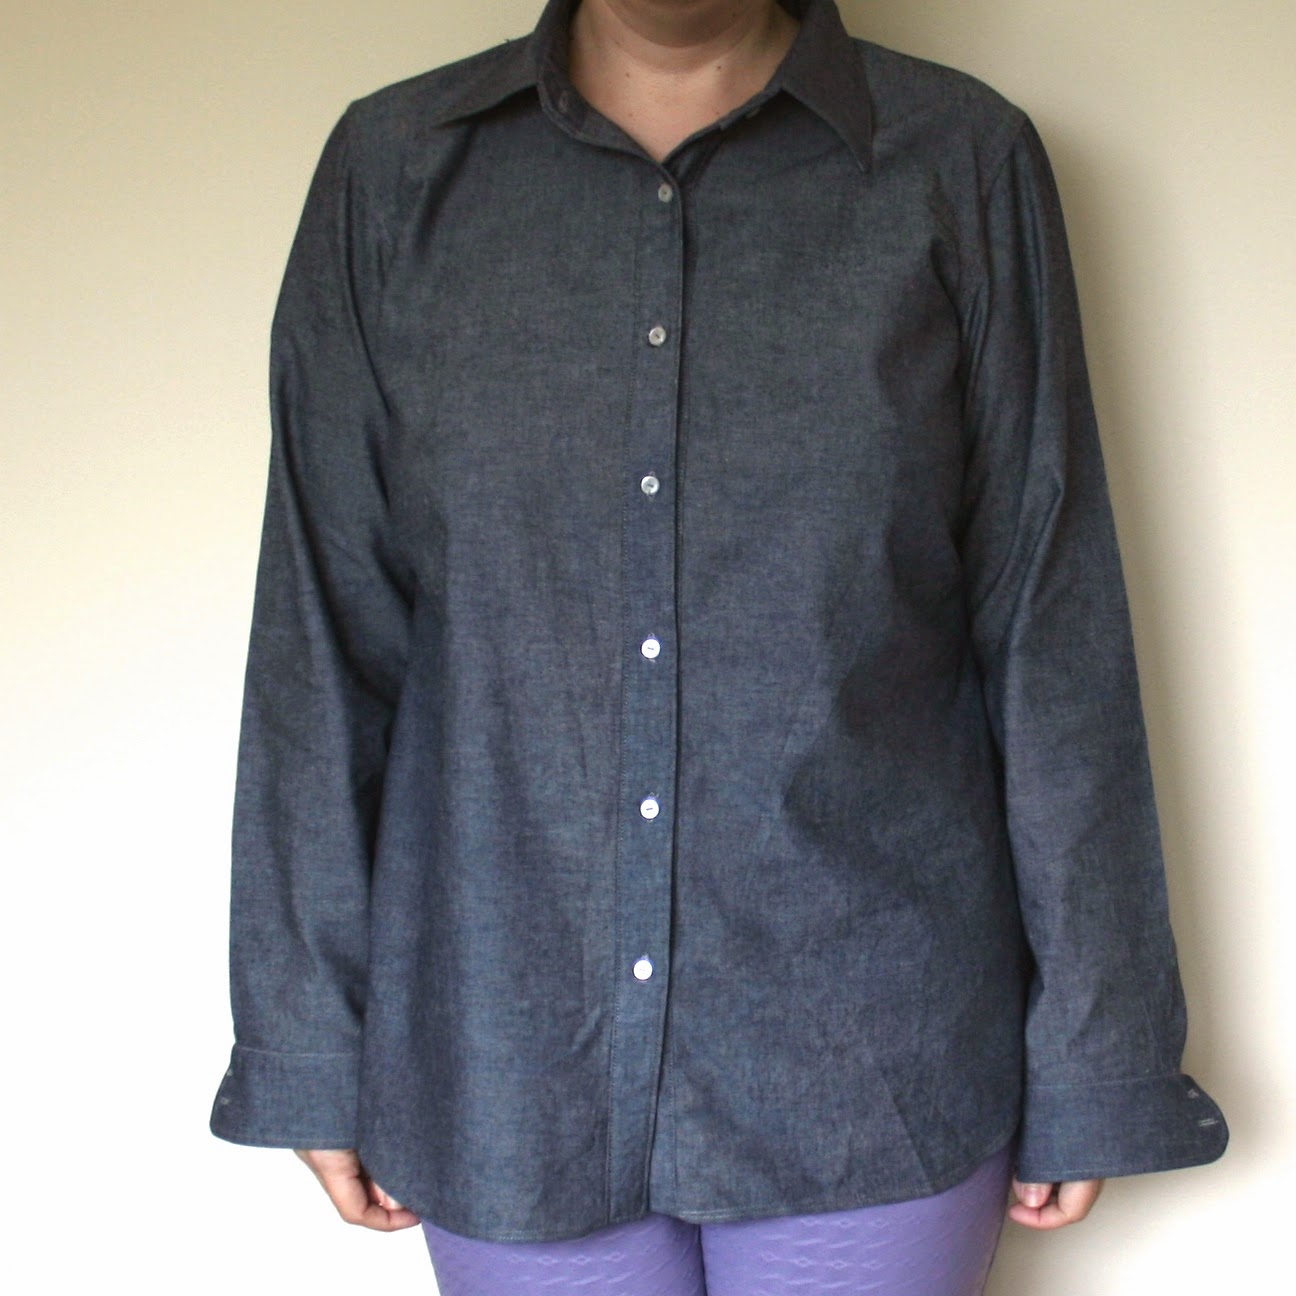
The other thing I made was another pair of yoga pants from a different pattern but in the same fabric. I hadn't entirely planned to wear another pair of purple yoga plans QUITE so soon after the first pair I made using the Silhouette 3400 Three Piece Yoga Pants pattern. Then I sat down on my garden wall and ripped a hole in one of my older RTW lounging pants on a nail I hadn't seen. Oops. Further yoga pants were therefore required.

Rather than make another Silhouette pair (wear update: the Silhouette pair are very comfy and I like them a lot but I really DON'T love the waistband treatment, which allows far too much freedom to the elastic and therefore results in it constantly getting twisted and shifting about) I decided to look through my pattern stash for a different pattern. I know I have like, a dozen options from Burda and Ottobre back issues, but my eye was caught by Simplicity 2369. I think every sewer in the western world has made this raglan faux wrap top & dress pattern. I am dead keen to do so too one day and bought the pattern ages and ages ago. Mostly, people have ignored the knit trouser pattern that came with it. They are super wide-legged and otherwise utterly basic: two pieces, elasticated waist done in a casing. I mean, I don't blame anyone for overlooking them really! Since I again really didn't care that much about this part of the pattern, I cut it out straight from the pattern sheet rather than tracing in a size 16, which is approximately my Simplicity size.


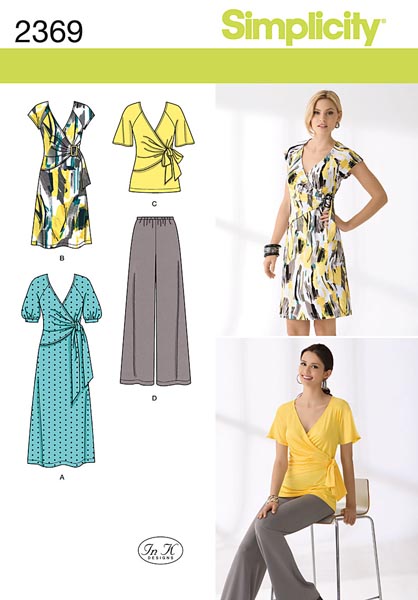
Simplicity 2369 as modelled by a hanger and me. I tied my shirt up like that for the photo only, promise.
They are SO wide-legged, it's like my knees have parachutes. I also probably could have sized down by one size because my fabric is super stretchy. However, they are SUPER comfortable and the fit is actually really great. This is hilarious to me because I've spent SO LONG being told that Big 4 trouser fit is TERRIBLE OMG THE WORST and yet they're the best fitting trousers out-of-the-envelope that I've tried so far. I mean, I know, these are wide-legged unfitted knit yoga pants so there SHOULDN'T be fitting problems... but I spent 30 minutes re-doing the crotch seam on the Silhouette pants and when I compared my revised Silhouette crotch seam pattern piece to the Simplicity pattern pieces, it was almost spot on. Maybe I have the actual body type that they draft for! I guess I deserve a break since my upper body is IN NO WAY the body type they draft for.

I would actually love these trousers in a really drapy and slinky knit. This fabric is just a little bit too firm for the style, and hangs too stiffly over my legs as a result. Still, it's FINE for a pair of lounging pants and I am pleased with the outcome.

Next up: a zipper hoodie from Ottobre 05-2014, which I am SUPER excited to sew. I also have a 3m piece of red jersey that I am mad keen to sew up, but I'm in at least two minds about what to sew with it. I don't know if you've been reading Michelle's great recently released pattern round-ups, but last week she mentioned the Gillian Wrap dress. Something about it REALLY grabbed me, so I bought the pattern while it was on sale, thinking I would make a red wrap top. Then I kind of went off the idea because the PDF is SO HUGE, ugh, more sticking and pasting, and I read the instructions and could not make head or tail of the waistband thing (probably it makes more sense when you actually have the pieces in front of you? Probably.). Then I made the Swoon cardigan and half-decided I immediately needed another one in red... except the fabric isn't great for a cardigan and certainly doesn't have the lush hand and drape of my purple one (I keep DROOLING over this fabulous mohair sweater knit in blue/green I found on a website that I could make another Swoon Scard Cardi from but I can't bring myself to pull the trigger on it. I've already WAY overspent my sewing budget this month). If I don't make either the Gillian or the Swoon cardigan, I definitely think I am looking for a more complicated sort of knit top. I don't want to make yet another basic tee even though, tbh I wear my basic tees constantly. Decisions, decisions

Saturday 18 October 2014

Easy knits (part one)

Here are the three latest additions to my wardrobe. Please excuse the photo of the turquoise top. I took the photo this morning, because I was already wearing it for the day. I realized, belatedly, that I apparently hadn't made any effort to, you know, straighten anything I was wearing, roll down the sleeves or make any effort at all to look sane in the photo. (Alternative interpretation: This is a very HONEST action shot of what it looks like for real on me on a normal day.) At any rate, I then went to have lunch, planning on re-taking a photo later of the top on Flossie... and promptly poured half a bowl of soup down myself. Right now it looks the "before" shot in a laundry detergent ad, so this is the best shot I'm going to get!
My Image M1152, Grainline Linden 1 and 2
All of these tops took a couple of hours each, and I made one a night on Wednesday, Thursday and Friday. I love how productive making knit garments makes me feel, although it's only because I overlock every seam and have (finally!) figured out how to zip through all my bindings and hems with my coverstitcher in no time at all.

MyImage M1152  Cowl Neck top
This is my second attempt at this cowl neck top pattern. Way back in 2012, the second knit garment I ever made was M1152 from My Image A/W 2011. To be honest, the first one I made was a mess, although apparently I was oblivious to this when I made it. I wore it maybe twice but then all the stitching at the neckline fell apart. More importantly: past!self, that size was ENTIRELY too small for you. I made the same size (44) again this week and I am about a size and a half smaller right now than I was when I made that top. This time it does actually fit.

This version turned out much better, especially the cowl neck as I abandoned the back facing in the pattern in favour of a binding, and finished the cowl edge with my coverstitcher.

You can't really tell from this shot on Flossie, but the pattern has dropped shoulders, which I don't find enormously flattering on me. If I made this again I think I might re-do the armholes using my knit sloper. Meanwhile, this is my last piece of this blue figured polyester knit, bought for £2/m in 2012. I got three tops and a wadder out of my piece of it and I still have a decent size scrap left.


Grainline Linden sweatshirt
My other two garments this week were made using the brand new Grainline Linden sweatshirt. My acquisition of this pattern is a sad tale of why you shouldn't make snap retail decisions at 6am when you've just woken up.

I bought 2m of this very light weight sparkly, stripy knit for £2/m in order to get free postage on a larger order I was making a few weeks ago (I'd have more shame about this, but no, really, I don't know anyone who orders online who hasn't done this at some point!). I decided I wanted to use it straight away, and spent an hour one evening going through my patterns looking for something I could use to make a very lightweight sweater-type layering top. There were a few in Burda, but nothing that really grabbed me. Then the next day I woke up (at 6am) and the Linden had been released, and in my early morning bleariness I went: Just the thing! and bought it. Note to self: you will always regret retail decisions made in this way.

Having irrevocably bought an e-pattern, and subsequently experienced shopper's remorse, I decided that logically (spoiler: no logic was involved) I decided that the thing to do was to IMMEDIATELY make up the pattern to assuage my retail guilt. So I did, twice, in View A each time (with the minor alteration of not using the cuff piece).

I am sure there is a way to get stripes to line up on at the shoulder seem of a raglan pattern, but as is abundantly evident from the shot above, I don't know what it is, and I therefore totally failed at it (actually, I didn't TOTALLY fail, in so far as SOME stripes match, but I failed MORE THAN ENOUGH). I did get the side-seams to match at least. And I do really like my hem band and neck band, although the neck-band, having been cut on the cross-grain of a 2 way stretch fabric, caused me buckets of drama (because of course I totally forgot it HAD NO STRETCH, sewed it on, panicked when it was 20cm too short, cut it off, flailed about desperately trying to find a scrap long enough to go round in one piece, etc etc). I originally used the cuff piece as well but the sleeves are LOOOONG and it looked stupid, so I cut them off again and hemmed it. Making the pattern the second time was even easier, mainly because I didn't repeat my user error with the binding and already knew not to bother with the cuffs.


I've another few easy knit projects, and one more complicated knit project, in the pipeline for next week as well, and then I will be finished the knit part of my Autumn sewing and have to contemplate what to do next. I'm keen to make a couple more woven tops, but I also have some non-garment sewing I want to start, and of course I am mad keen to try out my skills on making a coat before the year ends.

Tuesday 14 October 2014

Shirt-making, part deux (and a pair of yoga pants)

Last month I made my first button front, collared shirt, and I almost immediately cut another one in chambray. Then it took me just about FOREVER to actually make it. I kept whining to myself about how fiddly all the steps were, particularly once I got past the easy parts of the bodice and into the cuffs/collar/etc. As a result, it languished in my sewing room for days at a time, untouched.
Ottobre 05-2012-07 made in denim chambray
Eventually though I got over myself, and here is my chambray shirt made with Ottobre 05-2012-07 again (which I promise I will never wear with my chambray skirt made of the same fabric for fear of looking like that famous unfortunate Britney Spears/Justin Timberlake denim ensemble photo). I was determined this time to get a better fit and a better finish on this pattern, but my results were mixed.

On the fit side of things, my most pressing concern was how tight the first shirt felt across the upper back. This time I added 1.5cm to the upper back (from the shoulder seam to just below the armscye) I used the pre-existing dart to get rid of the excess at the actual shoulder seam. On the plus side, the fit is now exactly the way I want it. However, the way I dealt with the extra width at the shoulder turned out to be a mistake as it made for quite a large dart that I didn't position very well, resulting in a strange Hunchback of Notre Dame shape on the upper back. I probably care about this less than I should simply because 99.99% of the time I can't see it.

I also, thanks to themuslinette who linked me to a tutorial, removed 3cm of ease from the sleeve cap. You may recall that my biggest sewing problem with the original dark blue shirt was a nightmare setting the sleeves in, which required multiple attempts and still looked terrible when I was done. This time, the altered sleeves went in BEAUTIFULLY first time and I was so, so proud of them.... right up to the point where, having actually done lovely flat-felled armscye seams (first attempt at doing this! love the finish on the inside!) I tried the shirt on and discovered the sleeves have a HORRIBLE twist on them. (I know, I know, try my shirts on before I finish the seam, I have learned my lesson!)

As worn by me, showing how twisty the upper arms are. It's less noticeable with the sleeves rolled up.


Since the first version didn't have twisted sleeves (although it had all sorts of other sleeve problems), I know it's not a body vs. clothes fitting problem, which means either (a) I cut the sleeves off grain, possibly by screwing up where the grainline should be through my many many alterations of the pattern (width, length (twice), sleeve cap adjustment, etc) or (b) I set the sleeve in incorrectly, possibly because I altered the shape of the sleeve cap and didn't adjust the position of the mid-point dot. My feeling is that it's some combination of the two factors, possibly slightly more (b) because of the way that the shirt seems to want to twist right from the seam.

At any rate, because I'd finished my seams it was unfixable so I just have to live with it. At first I was all WOE :( my shirt is unwearable :( as a result, but then I wore it for an entire day and actually kind of loved it in spite of the sleeve problem. It probably helps that I rolled the sleeves up all day. So, whatever, I know it's not perfect and I think it is visible even to a non-sewer that it's not perfect, but it's wearable and that's a good start. However, before I make this again, I think I might re-trace and re-adjust the sleeve. I also need to take a hard look at the shoulder seams, which I feel are just a tad too wide.

Some shirt details -- I had horrible problems with the collar stand joining seam last time, this time is much better. I am also pleased with that collar point. (It is the same shirt, despite the seeming colour change!)
I also decided to try some different methods on the cuffs and collar, after being quite dissatisfied with the outcome following the pattern instructions. For this I used Shirtmaking by David Coffin Paige. I don't find this the most user friendly of books, I have to admit, but having struggled through the cuffs and collar instructions I was very happy with the outcome, which noticeably didn't have some of the more frustrating finishing problems of the previous dark blue shirt. Not to say either the collar or cuffs are perfect, but I think they're better.

I was helped in all these endeavours by my fabric, which was the same denim coloured chambray I used for a skirt a few days ago. I love these well-behaved all-cotton fabrics I've been using lately! I top-stitched in grey again and used classic white shirt buttons. Overall, I am super happy with the look of this shirt, even though some of the details aren't quite perfect.

Having finished my shirt on Saturday, on Sunday I had a real yen to sew, but I didn't want to do anything complex. I also really needed to add a really boring staple to my wardrobe: knit yoga pants.

Purple yoga pants using Silhouette 3400

I decided to use Silhouette 3400: Three-Piece Yoga Pants, which I got wayyyyy back when I first started sewing clothes for $1 when I bought another pattern. This was before my irrational loathing of Silhouette and Peggy Sagers took over and I refused to buy any more Silhouette patterns. I have multiple other yoga pant patterns, including a couple in my beloved Ottobre, but that would have meant tracing and adding seam allowances etc etc and I just wanted something really REALLY low effort. Normally I trace even cheap envelope patterns, but this time I just chopped into it, on the basis that I really don't care about this pattern.

My irrational loathing for Silhouette is not actually entirely irrational. First: what is with the front covers of these patterns?! You'd think this was a pattern cover for the top, but no, you're supposed to divine something about the bottoms from this appalling picture. Second: I understand the rationale behind the sizing scheme, but I disagree strongly with the argument that it's better to be given finished garment dimensions only. This is actually the main reason I can't be bothered buying any more of her patterns. I have two Silhouette blouse patterns, one of which I LOVE from a design perspective, but for the life of me I can't work out what size to make and it makes my head ache just thinking about it. (The REST of my loathing of Silhouette/PS is totally irrational and not worth discussing.)


In order to pick a size with this pattern, I sort of... flailed about and picked a size almost at random? Well, that's not entirely true. I compared a pair of knit trousers that I like to the pattern and THEN I flailed about and picked a size at random because none of the pattern sizes seemed to correspond in any way to what I already owned. In the end I made a 12 and it fits pretty much how I expected it to.

Once I'd made the pants, I did have to do some surgery. There was FAR TOO much fabric at the front of the crotch and believe me, it's not an attractive look to have a ton of extra fabric bunched up right at that point. I sewed a much deeper curve, and then I did it again, and honestly I should maybe have gone for a third pass but I was bored of this alteration by then and decided I could live with it. I also have some EPIC flat butt wrinkles going on which I didn't bother to fix this time but will fix when I make this again. And I will make these again, because, irrational loathing aside, this pattern goes together very well. Everything fits together exactly as it's supposed to, and the instructions were very clear. Plus, the shape and style is exactly what I like in a yoga pant. And this is a legitimately fast and easy project: I made these in under 2 hours including cutting out the pattern and re-threading my overlocker with appropriate thread. However, I'm going to have to think about the waistband because I ardently dislike how twisty it is.

Some of my fit photos, including an unfortunate close up of my butt, with flat butt wrinkles beneath D:

This fabric is something I bought really early on in my garment sewing career. It's a heavy polyester knit with plenty of stretch in both directions, and when I bought it I LOVED it. I got a huge piece (5m) from eBay from the lady liquidating her late mother's stash (I have SO MUCH fabric from 2012 that I bought from that lady!). Since then, as I've become more knowledgable and picky about what I'm buying, the weirdly slick finish of the fabric became more and more off-putting, and I went from "how will I ever use this, I love it TOO MUCH" to "how will I ever use this, I have SO MUCH and it's not very nice!". Surprisingly, though, I quite like it made up into yoga pants. I only used 1.6m, so I suspect I might end up making another identical pair at some point with some of the remainder.

Up next on my sewing table: a couple of tops using Butterick 5826 (with some minor changes taken from other recent patterns I've used) and another button-down shirt. I'm in two minds whether to make the Ottobre 05-2012-07 pattern again or whether to move on to another pattern. On the one hand, I have a lot of hard-won knowledge about that pattern now. On the other, I kind of want to make a shirt with a back yoke and some different details. So I am not quite sure what I want to do with that. I also want some more knit tops, and I really REALLY want to make New Look 6303, which to my extreme joy went on half price sale on the UK Simplicity/New Look site just in time for me to snaffle it.

Saturday 4 October 2014

A chambray skirt (Ottobre 05-2008-13)

The main thing I discovered as I made this skirt is that it is possible to TOTALLY overly complicate even a relatively simple pattern.

Back when I was planning what I thought I might make this autumn, near the top of my list was a pleated chambray skirt. Originally I was going to use the Deer and Doe Chardon pattern, but for a variety of reasons that don't really stand up to any close scrutiny (mainly that I couldn't be bothered to figure out what size I needed when I could just trace the size I always use in Ottobre. Also, I liked the pockets on the Ottobre pattern better than the pockets on the Chardon.) I ended up using this pattern from an older issue of Ottobre, 05-2007-13.

Magazine image and technical drawing for Ottobre 05-2007-13
I traced out my usual size (42), adjusted the length (hard to tell from the photos above, but it's drafted rather short and would have been considerably above-knee length on me) and that was about it as far as pattern work was concerned.

Fabric wise, I used the remainder of a large piece of denim coloured chambray that I have already used to cut out another Ottobre 05-2012-07 shirt like my blue shiny one. (I've decided the key to shirt-making is to do it in little stages, so I'm part way through my chambray shirt and will eventually I suppose have something to show for my work.)

Chambray pleated skirt front and rear, as modelled by Flossie
However, this was the point at which I started to make my life more difficult that it needs to be. The fabric is really shirt-weight (hence I am making a shirt from it....) and so needed some kind of lining or a slip. In retrospect, I should have made a nice A-line slip, because it would have more generally useful, or done a simple A-line lining. However, I felt the need to be CLEVER, and so I decided to interline it.

This decision wasn't entirely about being too clever for my own good. I do love an interlined skirt, and the black and white linen interlined skirt I made this summer with interlining still looks marvellous despite the flimsy linen and going through the laundry AND it doesn't crease as much in wear with the interlining. The differences between that skirt and this one are: 1. I used a shifty, slippery lining fabric on the chambray skirt rather than the nice stable cotton I used on the black and white one; 2. the other skirt is straight, whereas I had to repeatedly handle long diagonal seams on the chambray skirt; 3. pockets, pleats, other details on the chambray skirt vs. absolutely no details at all on the straight skirt.

Chambray skirt interlined interior; top-stitched pleats and yoke
All of this added up to mis-shapen pieces of lining due to the fabric shifting while I was cutting, alarmingly wavy edges because I worked the fabric so hard and a LOT of frustration in the construction process. On about Thursday, I was almost ready to give up entirely. Friday, I woke up and thought that since I do WANT this skirt and the fabric was quite expensive, it was better to see if I could get it finished, even if the actual finish wasn't as nice as I imagined it in my head. Having abandoned the idea of perfection, actually everything began to go swimmingly well, and I am very pleased with the final outcome, which I'm sure is a ~~~~lesson of some sort. Not sure what. At any rate, it still would have been 100% easier to make this garment if I had chosen almost any other lining method known to humankind.

Other than these self-induced construction issues, this is a lovely little pattern. I love the pockets and the top-stitching details that are suggested, especially top stitching the top of the pleats. I top-stitched in barely-visible grey on the blue fabric, and I like it a lot. I'm using the same thread for my shirt as well. The skirt is a nice shape. The only thing I don't love is the size and positioning of the beltloops, which isn't entirely in the right place for my body shape to wear a belt. Still, that's a very minor quibble. I also did a crappy job with my invisible zip, the worst I've done in ages, but that's totally user error and nobody's fault but my own.

As modelled by me :D
This skirt, incidentally, replaces a denim skirt I made almost exactly a year ago. Although I wore it reasonably frequently, in the end there were three problems with that skirt that I could never overcome: the fabric was too heavy for the flippiness of the pattern; although I pre-washed the fabric it subsequently shrank upwards a little bit more with each wash and soon became rather shorter than I liked; and the stretch fabric relaxed so dramatically when the garment was worn that it easily became two sizes wider. It went into the recycling bag a couple of weeks ago. I have very conflicting feelings about getting rid of hand-made garments, but sometimes it just has to be done.