Sunday 17 May 2015

Bits and pieces

New Look 6407
  • I have been kind of quiet lately because I am working on a short-sleeved blouse using New Look 6407 (view E, the one in yellow above) and it's not going at all well. I made a muslin because it's a lot more fitted than previous shirts I've made, but having made the bodice of the actual version... well, I don't know that my fitting changes worked. I fear it might end up being a total wadder. Luckily the fabric I used wasn't anything special or precious. I'm frustrated though because I felt like I was doing really well with shirt-making, but as soon as I stepped up a level in terms of fitting it all went downhill very quickly. :( The big problem is that I have an 18cm (7") difference between bust and under bust. I'm finding it really difficult to wrangle the darts that I need to achieve anything like a fitted look through both bust and waist/hips. I think I might need to find a similar closely-fitted pattern that uses princess seams for my purposes, because I just don't think darts cut it when you're working with such a huge bust/underbust difference.
  • I recently bought a double tracing wheel which is something I've had on my wishlist for a loooong time. I put off buying it because my old (enormous, lasted me 2+ years) package of tissue paper I was using to trace patterns onto was very thin. It wasn't at all difficult to see through it to trace off patterns from Burda/Ottobre, so I just did that and then added seam allowances by hand. However, I finally ran out of the thin paper and the new paper I bought is impossible to see through -- you can only just see that there are lines on the pattern sheet underneath, but no details -- so I had to do something different. I wish I'd bought the tracing wheel ages ago now. Being able to add my preferred seam allowance at the same that I trace is A++++. Definitely worth thinking about it you're a big magazine pattern user and you don't already use one.
  • Speaking of pattern magazines, I just renewed my Burda subscription for another 6 months and for the first time since I started getting it I really considered not doing so. The problem is not so much Burda itself as the fact that I really, seriously don't like most of the trends at the moment, which Burda faithfully reflects. I was in a massive shopping centre the other week window shopping and yes, it's all totally on trend in the UK at least, but I no more want to make it than I want to buy it. There's probably been enough patterns I like in the last few issues that I can just about justify continuing to buy the magazine... but only just.
  • I do use my back issues a lot for inspiration, but also apparently to drive myself nuts. I briefly drove myself actualfax crazy-faced looking for "perfect" dress patterns to match the fabrics I pulled out of my stash for casual summer dresses this year. I got so far past over-thinking what I wanted to make that I gave myself a blinding headache one day and had to put myself to bed for a couple of hours. Rationality has been restored now, but wow, yeah, that was a nutty, mildly obsessive rabbit hole that I fell down of ~figure-flattery and ~age-approriate dress styles.
  •  So much left on my sewing plan for May, and we're already half-way through the month!

Thursday 7 May 2015

Mistake recovery (New Look 6890)

I have been sorting out my envelope patterns over the last few days in preparation for maybe selling a few of the ones that I'm pretty sure I'll never make. Some of them are the wrong size and I can't see myself grading, but some of them (many of them, in fact) date from when I first started sewing garments, when the nicest thing I can say about some of my purchases, both fabric and patterns, is that Mistakes Were Made and Lessons Were Learned.

New Look 6890 was one such rookie error.

New Look 6890

This was the third pattern I bought. It seemed like a great idea at the precise moment in time when I ordered it: a "two hour" pattern, that looked very easy! No zips or other difficult bits, just straight seams and a bit of bias tape, and one button! Plus I thought the model on the cover looked pretty cute in her little floral dress despite the weird accompanying pink beret. That is, the very young, thin model who probably looks pretty cute if she wears a bag...

Here of course is where my original reasoning all starts to fall apart. I wouldn't EVER buy a dress that looks like this from a shop, not least because I am in my late 30s and not my late teens. I am not convinced this kind of ultra wide-necked peasant blouse look has ever suited me, in fact, teenager or not, nor have I ever preferred this totally unfitted style of dress. The merest minutes of reflection after the pattern arrived in the post led to the inevitable Buyer's Remorse, and I sort of shoved it in the back of my pattern box and then forgot about it as it filled up with other (not necessarily any more wise) purchases.

Since then, with a more experienced eye, I've glanced at the pattern a couple of times in an effort to determine whether it is in any way useful. Every single time without fail I've sputtered over the fact that this pattern has SEVEN AND A HALF INCHES (19cm) of ease built in at the bust. I realize it's meant to be a loose-fitting pullover dress, but that's insane. The last time I looked at it I sort of scoffed and went "it would be like wearing a nightdress out of the house!"

Meanwhile, unrelatedly and as documented over the last year or so, I've been combining my desire to have some easy, restful sewing projects in my sewing queue with a complete overhaul of my PJ drawer. I tend to wear PJs and t-shirts to bed, but I've always had one thin nightdress in my drawer for really warm nights. That hit the top of the list to replace this summer sewing season. I considered making a nightshirt from the 12/2014 issue of Burda that I liked the look of, but that pattern is so voluminous that I realized even before I started tracing that it wouldn't fit on my piece of fabric, which was only 110cm wide. Casting about for an alternative, I suddenly remembered my disparaging thoughts about New Look 6890...

New Look 6890 in pale blue polka dots, as modelled by Flossie
The front cover of the pattern does not lie: it took me just a little more than two hours to make this after I'd done the cutting out part. It only took that long because, as usual with my nightwear, I used French seams as I think it does a little bit for the longevity of frequently-laundered garments.

I made a straight size 16 with no alterations, though really I should have cut a 14 based on my measurements. If I wanted it to wear as a dress outside of my house where people might see me, I am really not sure what size I would have to start with. Something with less than 7.5" of bust ease, for sure. At any rate, the fabric is barely opaque so I'm not modelling it for this blog. You'll have to take my word for it that it is AMAZINGLY voluminous on, and it looks quite like something a granny might wear, particularly since I made it in this demure pastel blue polka dot polycotton (try saying THAT 10 times quickly). The neck is elasticated, which I find slightly weird, and the elastic is threaded through a bias tape casing. I used home-made bias tape that I made last year. It was just a little narrower than the pattern called for, which I thought would be fine, but eesh, this made threading the elastic a big faff. That was the most difficult thing about the pattern however, and it only too a few minutes. That said, I think an absolute beginner would actually find the bias tape application at the neckline quite challenging as well.

If I'd ever needed convincing that I was never going to want a dress made from this pattern, this nightdress has confirmed it. It's not even really very attractive as nightwear, but I prioritize a lot of other things over attractiveness in my PJs so I don't really care. I almost didn't blog about it at all, because after all, who cares about my sad frumpy nightdress? However, I am quite proud of myself for finding a use for this otherwise deadweight pattern, and I like to document everything I make, no matter how terrible or disastrous. And so, in conclusion: voluminous nightie from rookie mistake pattern is a win. :D

Monday 4 May 2015

A plan that came together (Burda 03-2013-124 in blue gingham)


Late last year, around December, I had a sudden yen for a blue gingham shirt, pinned about 30 images of people wearing them on Pinterest, and then went in search of suitable fabric. Sadly, most gingham fabric available seems to be very cheap but rather nasty heavy-on-the-poly polycotton or else very expensive named brand quilting cotton. Eventually, however, I turned up a seller with a range of inexpensive 100% cotton ginghams, including a rather nice dark blue. The problem was that it was only 110cm wide. Actually, the problem was not that it is 110cm wide, it's more than I kind of hand-waved the question of how much I needed without checking, all "if I can get a shirt out of 1.6m of 150cm wide, then 2m of 110cm wide will be completely fine!". Then it turned out none of my existing shirt patterns actually did fit on the fabric and I was briefly stymied.

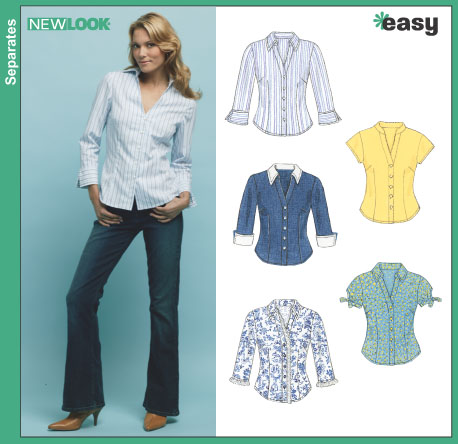
Burda 03-2013-124, taken from the magazine
Meanwhile, I also have a lovely piece of hoarded linen to make a shirt from for this summer. I had picked out Burda 03-2013-124 as a possible pattern for that fabric, but while I am pretty confident about new shirt patterns now as I have a handle on fitting them, I also didn't want to cut into my treasured linen fabric with an untried pattern. As it would be trivial to replace the gingham and since the pattern is for various reasons relatively undemanding for fabric length (overall length, one piece collar, full length sleeves but made for rolling without plackets or cuffs) it was a perfect combination. I managed JUST BARELY to squeeze the pattern onto my 2m of gingham. I had so little left after I cut the main pieces that I had to cut the collar on the cross-grain and piece the bias binding for the inner collar. There was zero possibility that I could do any fancy matching on the shoulder/sleeve seams (which is something I'd been reading about), but I did get it all out somehow with matched front and side-seams.

My version of Burda 03-2013-124
The main reason I was particularly keen to test run this pattern with the gingham is that, as mentioned in previous blog posts, my weight has been dropping recently for various (mainly medication related) reasons. I'm presently towards the low-middle end of what I consider to be my normal range. Quite a few of my larger sized garments are looking just a little too big on me and since this top is for immediate wear over the next couple of months, I decided it behooved upon me to take some measurements and potentially start from a smaller size than I have normally with Burda.

Side view -- you can see the side and sleeve tabs on this shot (and just barely, the matched side-seams), and also the way the front swings forward
I ended up with the usual hodge podge of sizes after my adjustments, but overall about 1-2 sizes smaller than usual. The back is the most straightforward: it's a 40 at the shoulder, tapering to a 42 through the waist and hip, with a 1cm square shoulder adjustment. The sleeves are a straight size 44 but my elbows are still wider (how is it possible that my elbows are 3 sizes larger than my shoulders!?) than a size 44 and I may need to adjust the lower arm slightly. The front is a size 40 at the shoulder, with a 1cm square shoulder adjustment and a 2.5cm FBA. I created a bust dart, which is just about visible if you look for it on the shot above, and I left the width in rather than tapering the extra out at the waist and hip. This is fine as far as it goes. I am not a size 40 at the waist/hip, after all, but nor am I am a size 40 + 2.5cm, it turns out, and as a result there's just a little bit too much volume at the front hip that swings forward.

Back view
Normally, I would probably have changed the length of the top a little and I was a bit concerned that this was going to end up too short. However, I really didn't have enough fabric to change it by even 1cm in length. As it turns out, I really like this length, so I'm happy! I do like a shirt-tail hem, as well which this mimics with the buttoned side-tabs.

Front view on me
Although I feel really comfortable with the bust fit -- i.e. it doesn't pull or gape and I have plenty of wearing ease as far as movement is concerned -- the photos on me show a certain amount of "you need a larger FBA!" wrinklage going on. I also noticed that the bust dart ended up just a smidgeon too low -- just about 1cm or so -- which might help. I've managed to accidentally cut off the evidence in my side on shot, but I also definitely also need a small-ish high round back adjustment -- my collar is pulling away from the back of my neck just a touch. Other than that I'm pretty pleased! (To be fair, my standards for fit are probably not all that high. I'll still make those little alterations before I made this again, however.)

Back view on me

Side view on me

I also really love some of the details of this shirt. This was a great reminder why I love Burda and own so many of the magazines -- the fact that the pattern goes together so well, and that there are so many great little construction and design details. Of course you can do anything you like with buttons, but personally I probably don't think to change things up too much from pattern directions. I love the groups of three that this pattern suggests, and for once they were perfectly lined up for me so that I got right depth of neckline wearing the shirt open and good button coverage at the bust. I admit I was a bit doubtful about the collar -- I've only made two-piece collars up to now, except for that one decidedly underwhelming Butterick top, where, I must admit, the collar is a perpetual source of annoyance. This one came up lovely, even though I had had to resort to cutting it on the cross-grain.

Collar and button detail
I was exceedingly puzzled by the instructions initially for how to finish the inside of the collar with the bias strip, but actually LOVE the finish this gave me when I figured out what Burda wanted me to do. The main thing is that you have to trim as much excess as possible -- I ended up with like 4mm seam allowances left under the bias strip -- in order to sew the strip nicely and avoid a massive lumpy seam. My other seam finishes were just the usual shirt-making stuff -- flat-felled everywhere, including, for only the second time, the shoulder seams, and narrow-ish hems.

View of inner collar bound with bias strip
The one construction detail that, in retrospect, I wish I had done differently, is the sleeves. I don't think I had enough fabric for any reasonable kind of cuff, but if I HAD, I think I would have been more annoyed by the plain hemmed sleeves. They're meant to be rolled up, and they do look fine that way. However, it looks a bit odd if you wear them unrolled and they are sort of 7/8th length on me, which I loathe. Luckily, pattern #125 is the same shirt but longer and with true cuffs (with a bound placket) as well as a pocket, so if I did want to make this again as a true long-sleeved shirt it wouldn't be at all problematic to do so.

And that's my gingham shirt! I love how it came out and I'm really pleased that I decided to make this as my first summer-y garment. I never bother to "style" my fit photos for this blog, but I plan to wear this with white or navy linen trousers or shorts this summer.

Next up: I am not entirely sure! I feel a bit like a centipede on roller-skates -- trying to go in too many directions at once. I may start on a long-planned bag project next while I contemplate my next garment project.