Yesterday
I posted my to do list for December and started it off with:
"1. Finish the bag for my sister-in-law."
Then I knuckled down and FINISHED THE BAG, hurray! Although, extremely annoyingly, I am two rivets short and had to order some extra. I took the photos and wrote the review before the extra rivets arrived, so just imagine they're on there, all right?
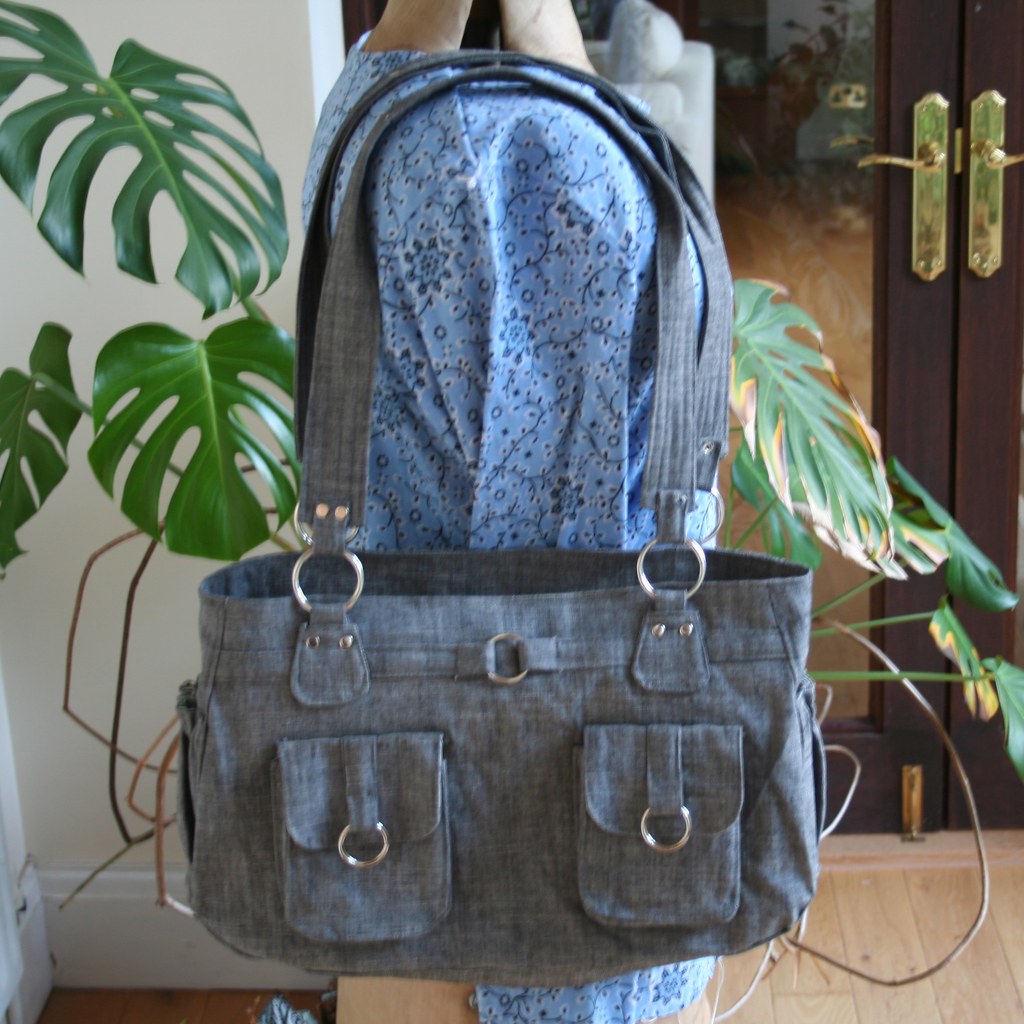
 |
| Front view of ChrisW Olivia bag in grey denim |

This is the second
ChrisW Designs pattern I've made although I actually have another two of her patterns I have yet to try out. I've made three
Evelyn bags --
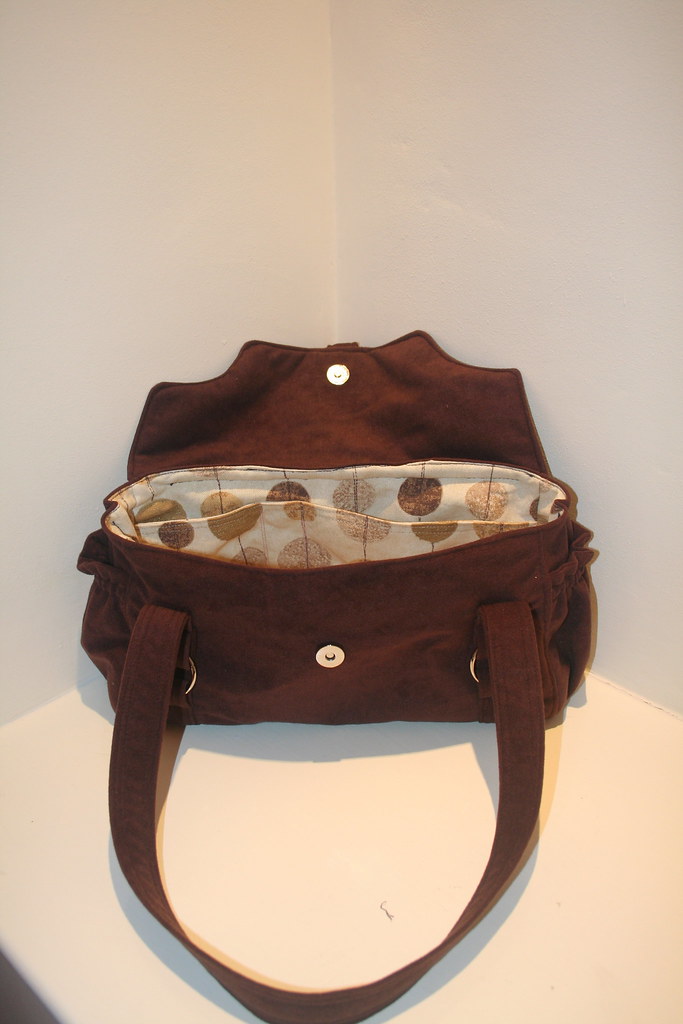
one for myself,
one for my sister-in-law, and
one for my aunt. The one I made for myself is still my go-to brown bag and I love it, so I call that a wild success. I also own the patterns for the
Snazzy Slouch and
the Bella. And of course I've downloaded, although not yet used, her free pattern,
the Coco. I have my eye on a couple of other new patterns she's put out recently (
the Eve, and
the Abigail), but my personal bag pattern rule is that I have to sell a bag in order to buy a pattern, and recently I've been spending on my shop proceeds on clothes patterns!
I would have to say ChrisW is my favourite "complicated" bag pattern designer. Apart from
Amy Butler's Style Stitches book and some of her envelope bag patterns, and some (but not all) of
Lisa Lam's patterns (including
her two books) actually, she's probably the only bag pattern designer I know of who puts out this kind of complicated, hardware intensive pattern. I actually don't use her patterns at all to make bags for my shop as they're time and labour intensive and I can't price it accordingly.
Pattern review (also here) -- I'm missing off my usual nit-pickery and cost analysis as this is a gift for someone.
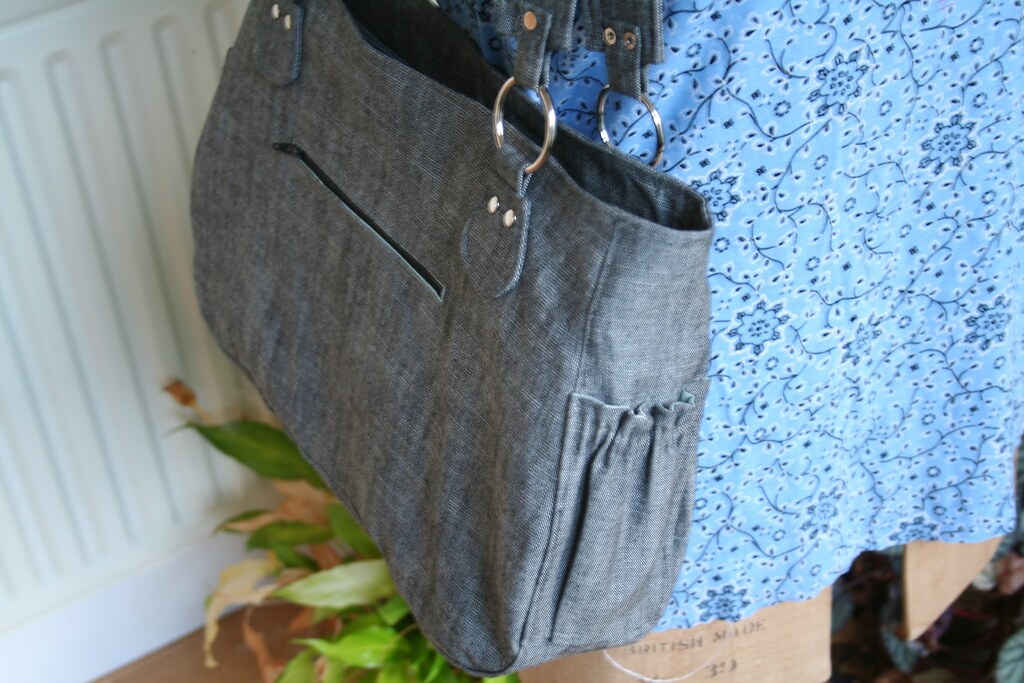
 |
| Back view with inset zip pocket |
Pattern Description: From the designer's website: "The Olivia is not only roomy and functional but with loads of pockets you will be super organized as well!"
Pattern Sizing: The finished bag is approximately 40cm long by 25cm wide by 10cm deep (16" x 10" x 4").
Did it look like the photo/drawing on the pattern envelope once you were done sewing with it? Yes, I think so.
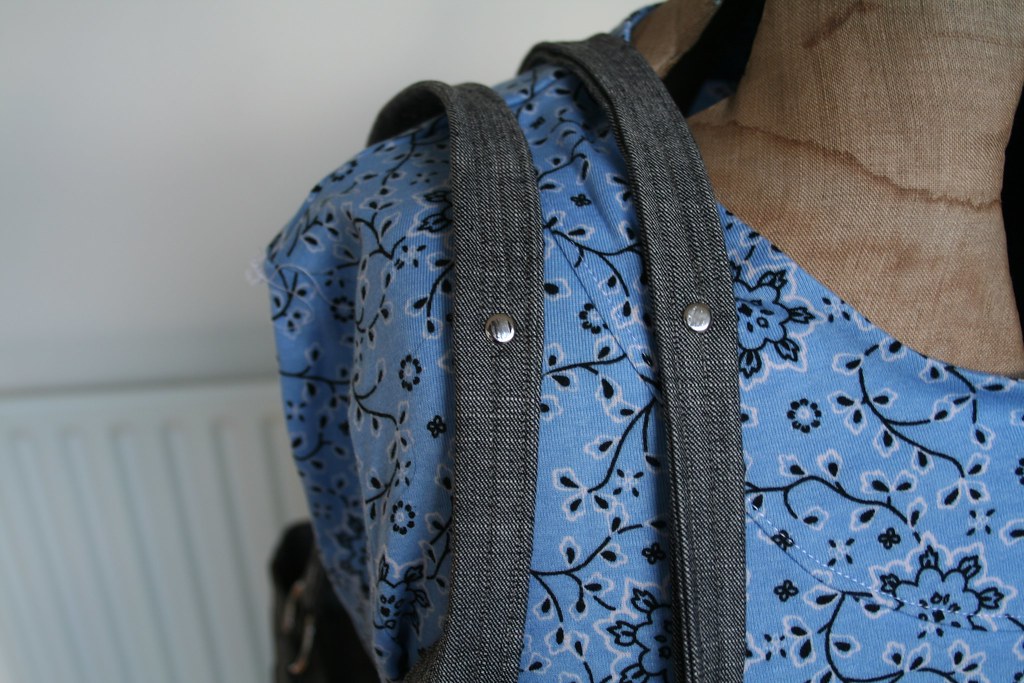
 |
| Straps folded over at the shoulder and riveted for durability. |
Were the instructions easy to follow? Yes. ChrisW provides very thorough instructions with plenty of photographs. I've made enough bags -- and specifically, some of her other patterns, which share some similar features -- that I don't need anything like the detail she goes into. However, for the less experienced bag-maker, every step is spelled out. One thing I could fault the pattern designer for is the limited number of notches/markings she uses on the pattern pieces, although they're otherwise extremely well drafted and fit together exactly as expected.
What did you particularly like or dislike about the pattern? The recipient of this gift is someone who carries around her entire life in a bag, so I wanted to make her something large, rugged, and with plenty of pockets. This pattern fit the bill on all counts. I particularly liked the front pockets and the various internal pockets, and the use of metal hardware. I also liked the complexity of the finished pattern, which gives a really good-looking finished product.
 |
| Side view with elasticated pocket |
On the other hand, there are literally dozens of pieces to this pattern -- I cut 62 pieces including interfacing, and since I was using heavy fabric I barely used any interfacing -- and it took hours upon hours to make. There's nothing particularly complicated in the pattern, especially if you've made bags before, there are just A LOT of little pieces and swapping out thread, machine feet, etc. I don't mind because I wanted to make it and am happy to spend the time, but the amount of time you'll need is something to keep in mind. There is one small detail I actively dislike, and that is the raw edge/satin stitch method of attaching the front pocket flaps to the bag. I went ahead and did as the instructions suggested, but I would do it slightly differently next time.
Fabric Used: Grey denim for the outer. This is a relatively lightweight denim I bought online imagining I would make a denim skirt with it. However, the description was misleading and when it arrived there was no stretch in it at all -- not great for a skirt. As a non-stretch fabric, though, it was very good for a bag. The lining is a designer home-dec weight remnant by Sanderson in duck egg and grey. The use of denim was probably the biggest challenge making this bag because it made for some exceptionally bulky seams and turning all the various straps and loops was a real chore in such a heavy fabric. On the other hand, the weight of the fabric saved on interfacing. I just used ultra-heavy weight on the base and fusible fleece on the lining for some extra bulk.
 |
| Top view with zipper gusset closed |
Pattern alterations or any design changes you made: I didn't interface the bag in the way I was directed, mainly because of the fabrics I was using. I'm familiar enough with bag-making and interfacing to know what I can change and what effect it will have on the finished bag. I've made ChrisW patterns before for myself and sometimes I omit some of the bells-and-whistles, like the external zipper pocket and some of the internal pockets, just because I don't tend to use them. As this was a gift, I went all out and included all the details. I also added a key clip on the inside of the bag, as I do with all larger bags!
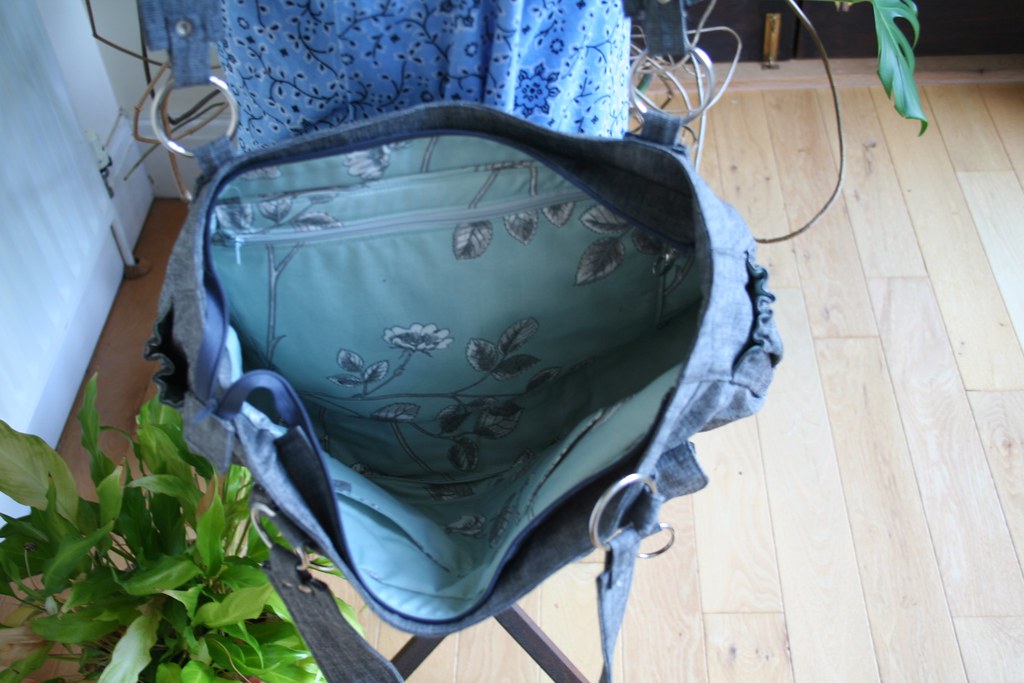
 |
| Lining: inside zipper pocket, patch pocket and key clip (just visible on the upper right) |
Would you sew it again? Would you recommend it to others? Yes, I'd quite like to make one for myself now I've made this first one. I wouldn't make it in denim again though, just because of the time it took to turn the straps! I really do recommend this pattern if you want to make a large, feature-rich bag, but it's not suitable either for an absolute beginner or the chronically impatient.
Conclusion: A great pattern at the more complex end of bag patterns, but not for the time-poor or novice sewist.


